(This post covers the 4 part Navi posts in July and August of 2023 and ends in April of 2024)
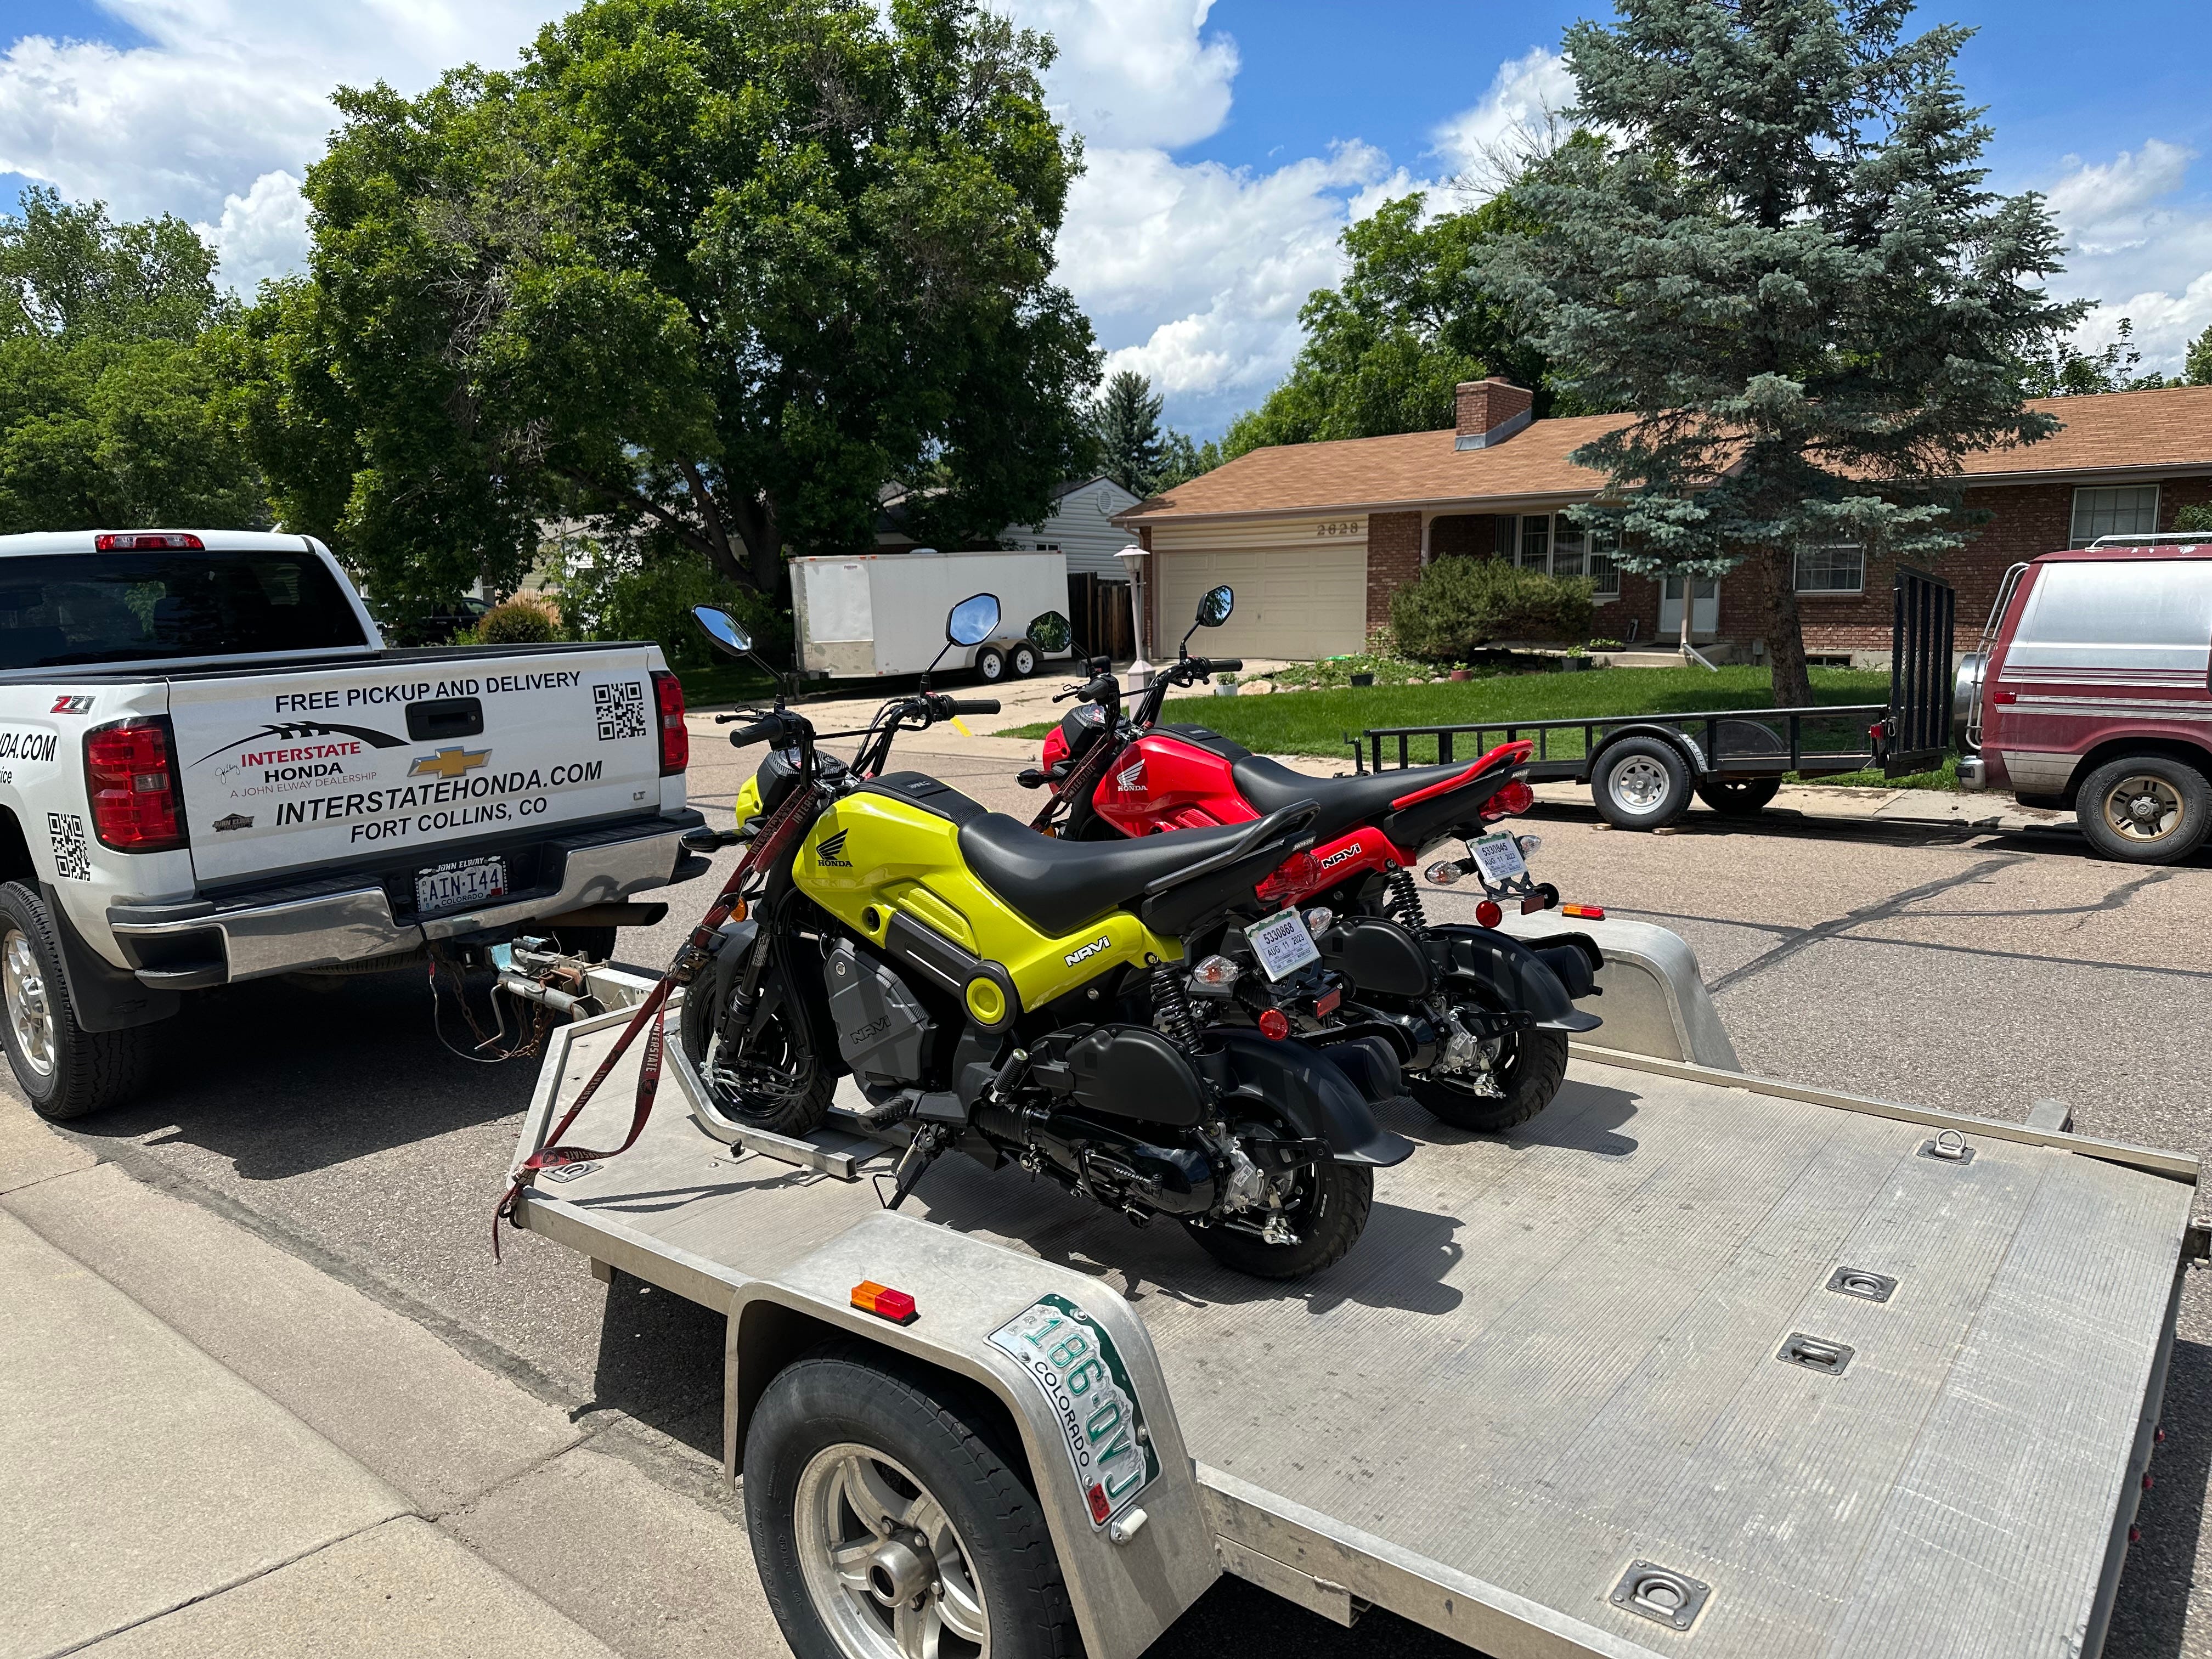
The garage has been expanding since I last wrote about it and if you are following the posts, you might have noticed I picked up a pair of Honda Navis. The Navi is a curious little bike/scooter hybrid and is a lot of fun in its stock form, but they are easy to modify and modify I think I will. The Navi is to become the Super Navi and this page describes each stage of the mods and links to the associated blog post.
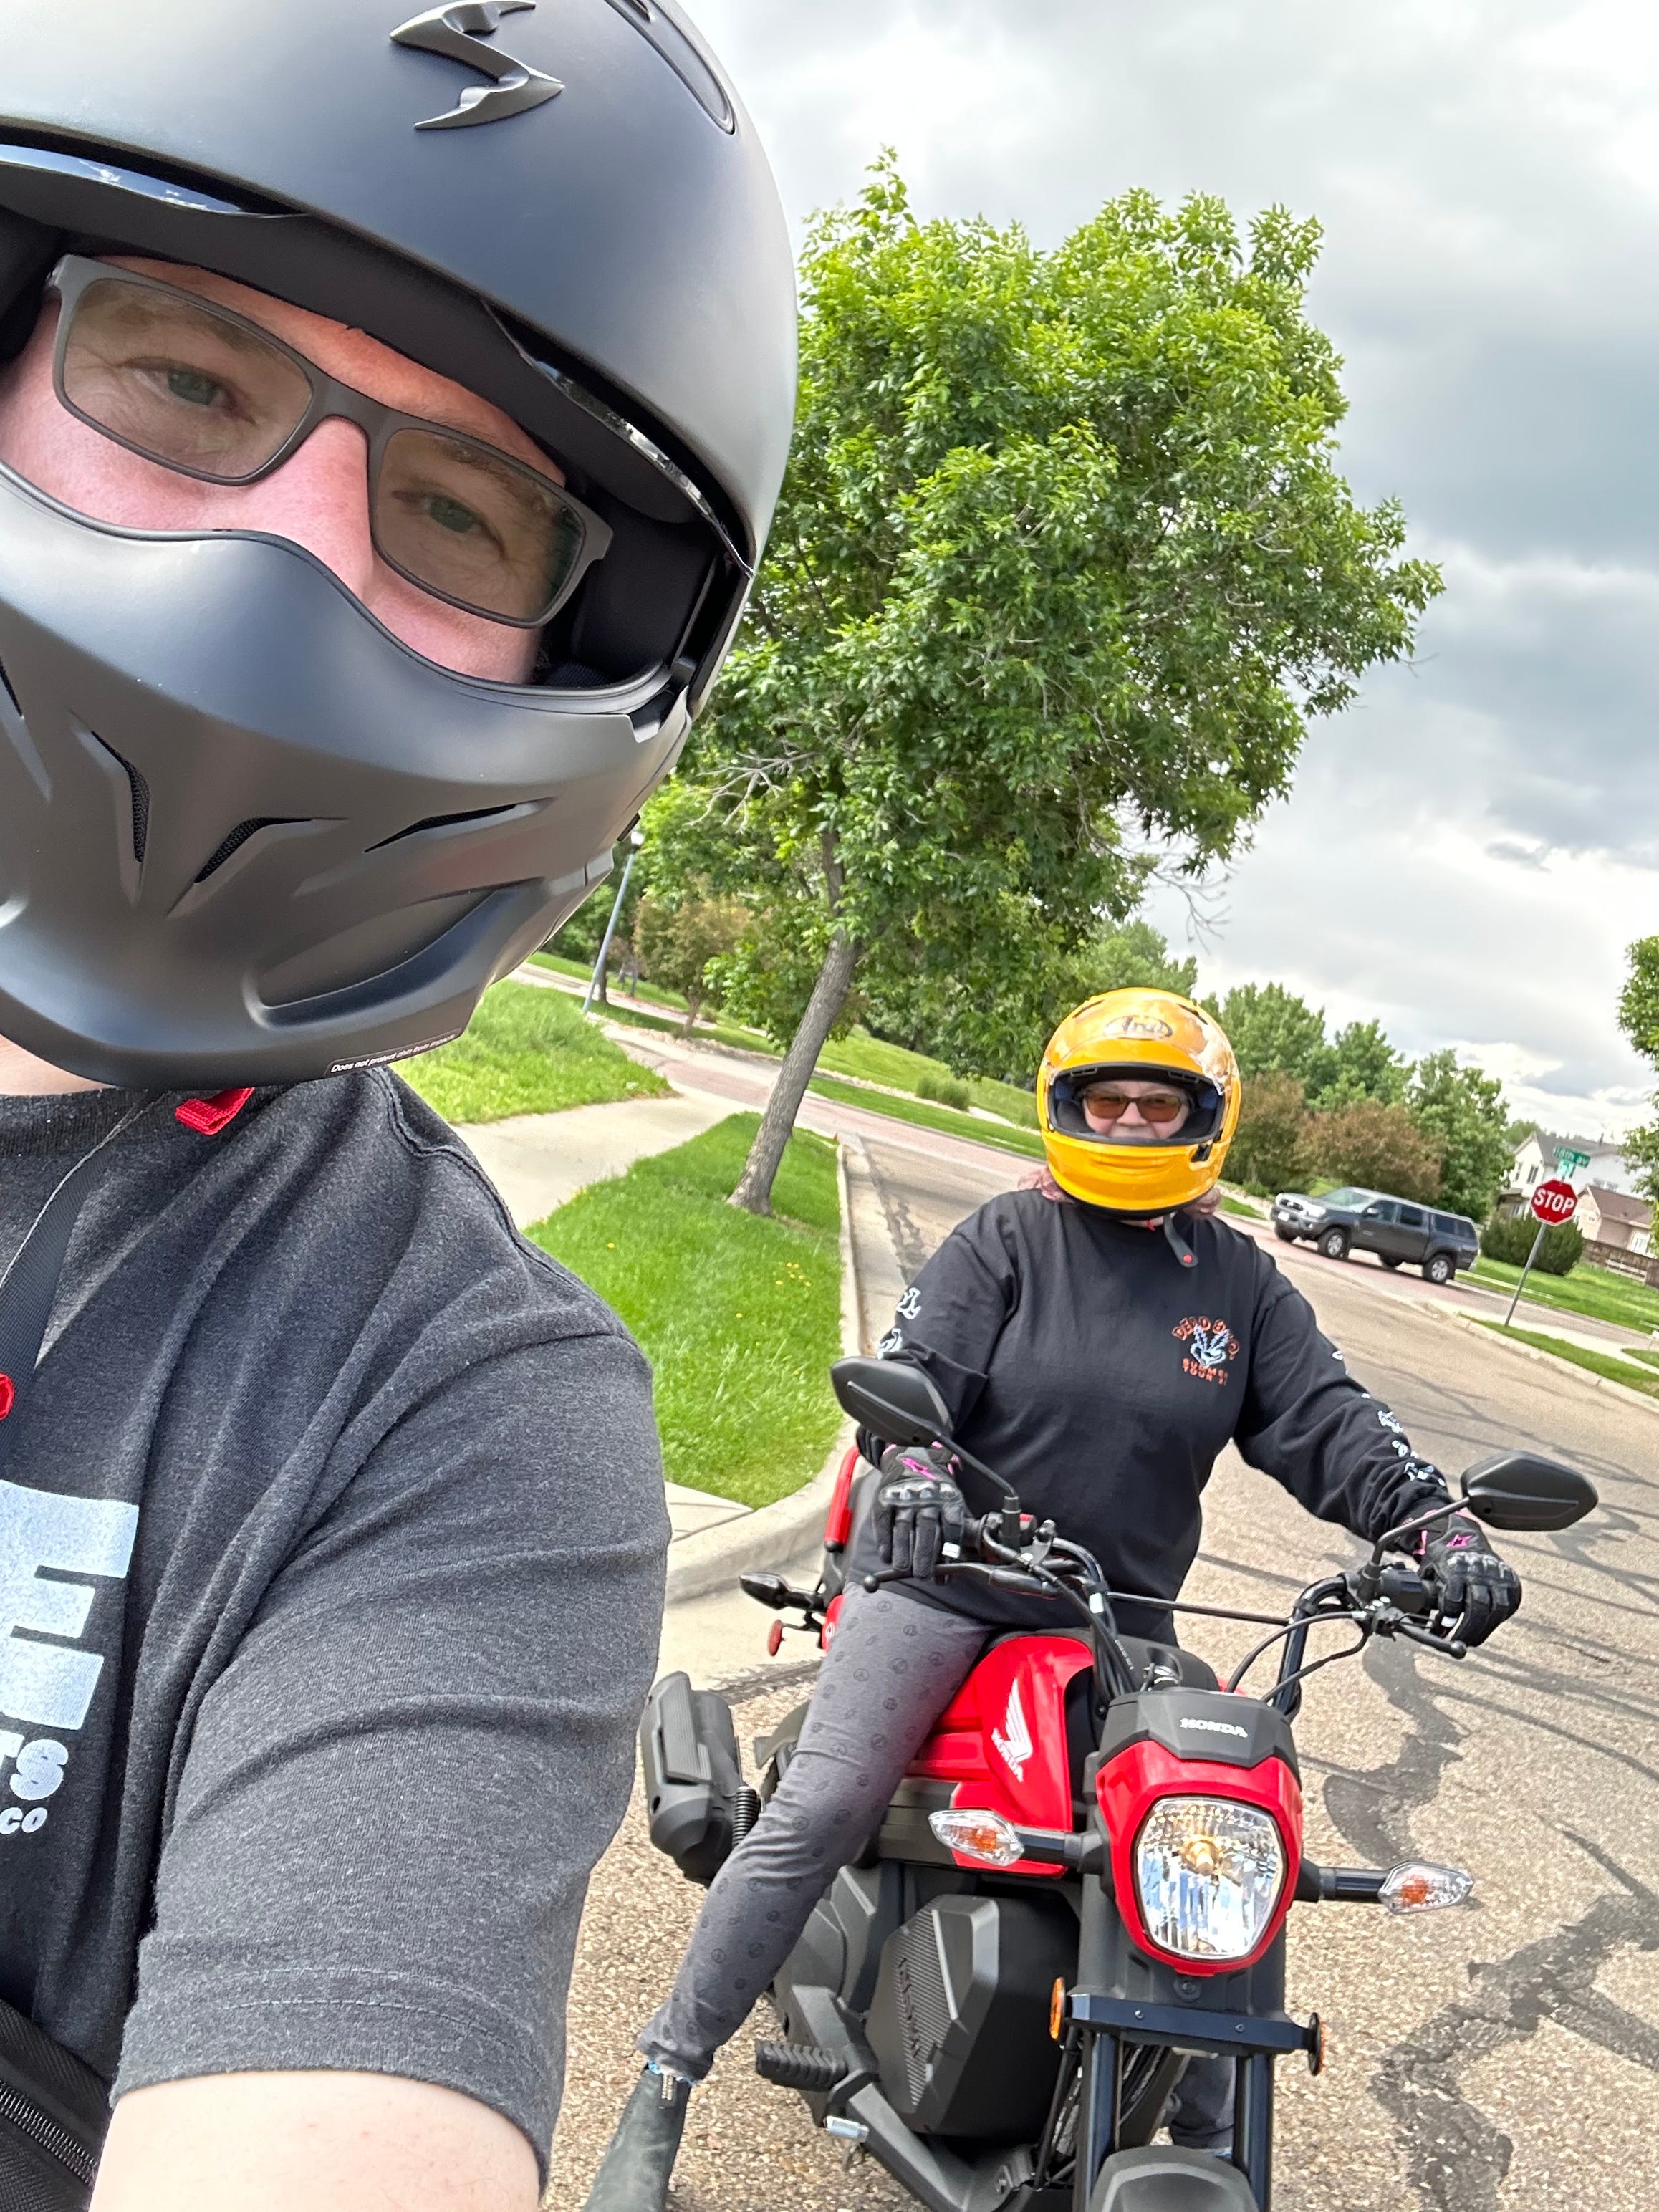
One thing that I have not yet mentioned yet is that my wife also rides. She has just completed her Trike training course and now has her trike endorsement. But I am not going to write about the trike yet. Her next step is to get her motorcycle endorsement so, she needs a bike. After some consideration we decided to get her a Honda Navi because of its ease of use and simplicity.
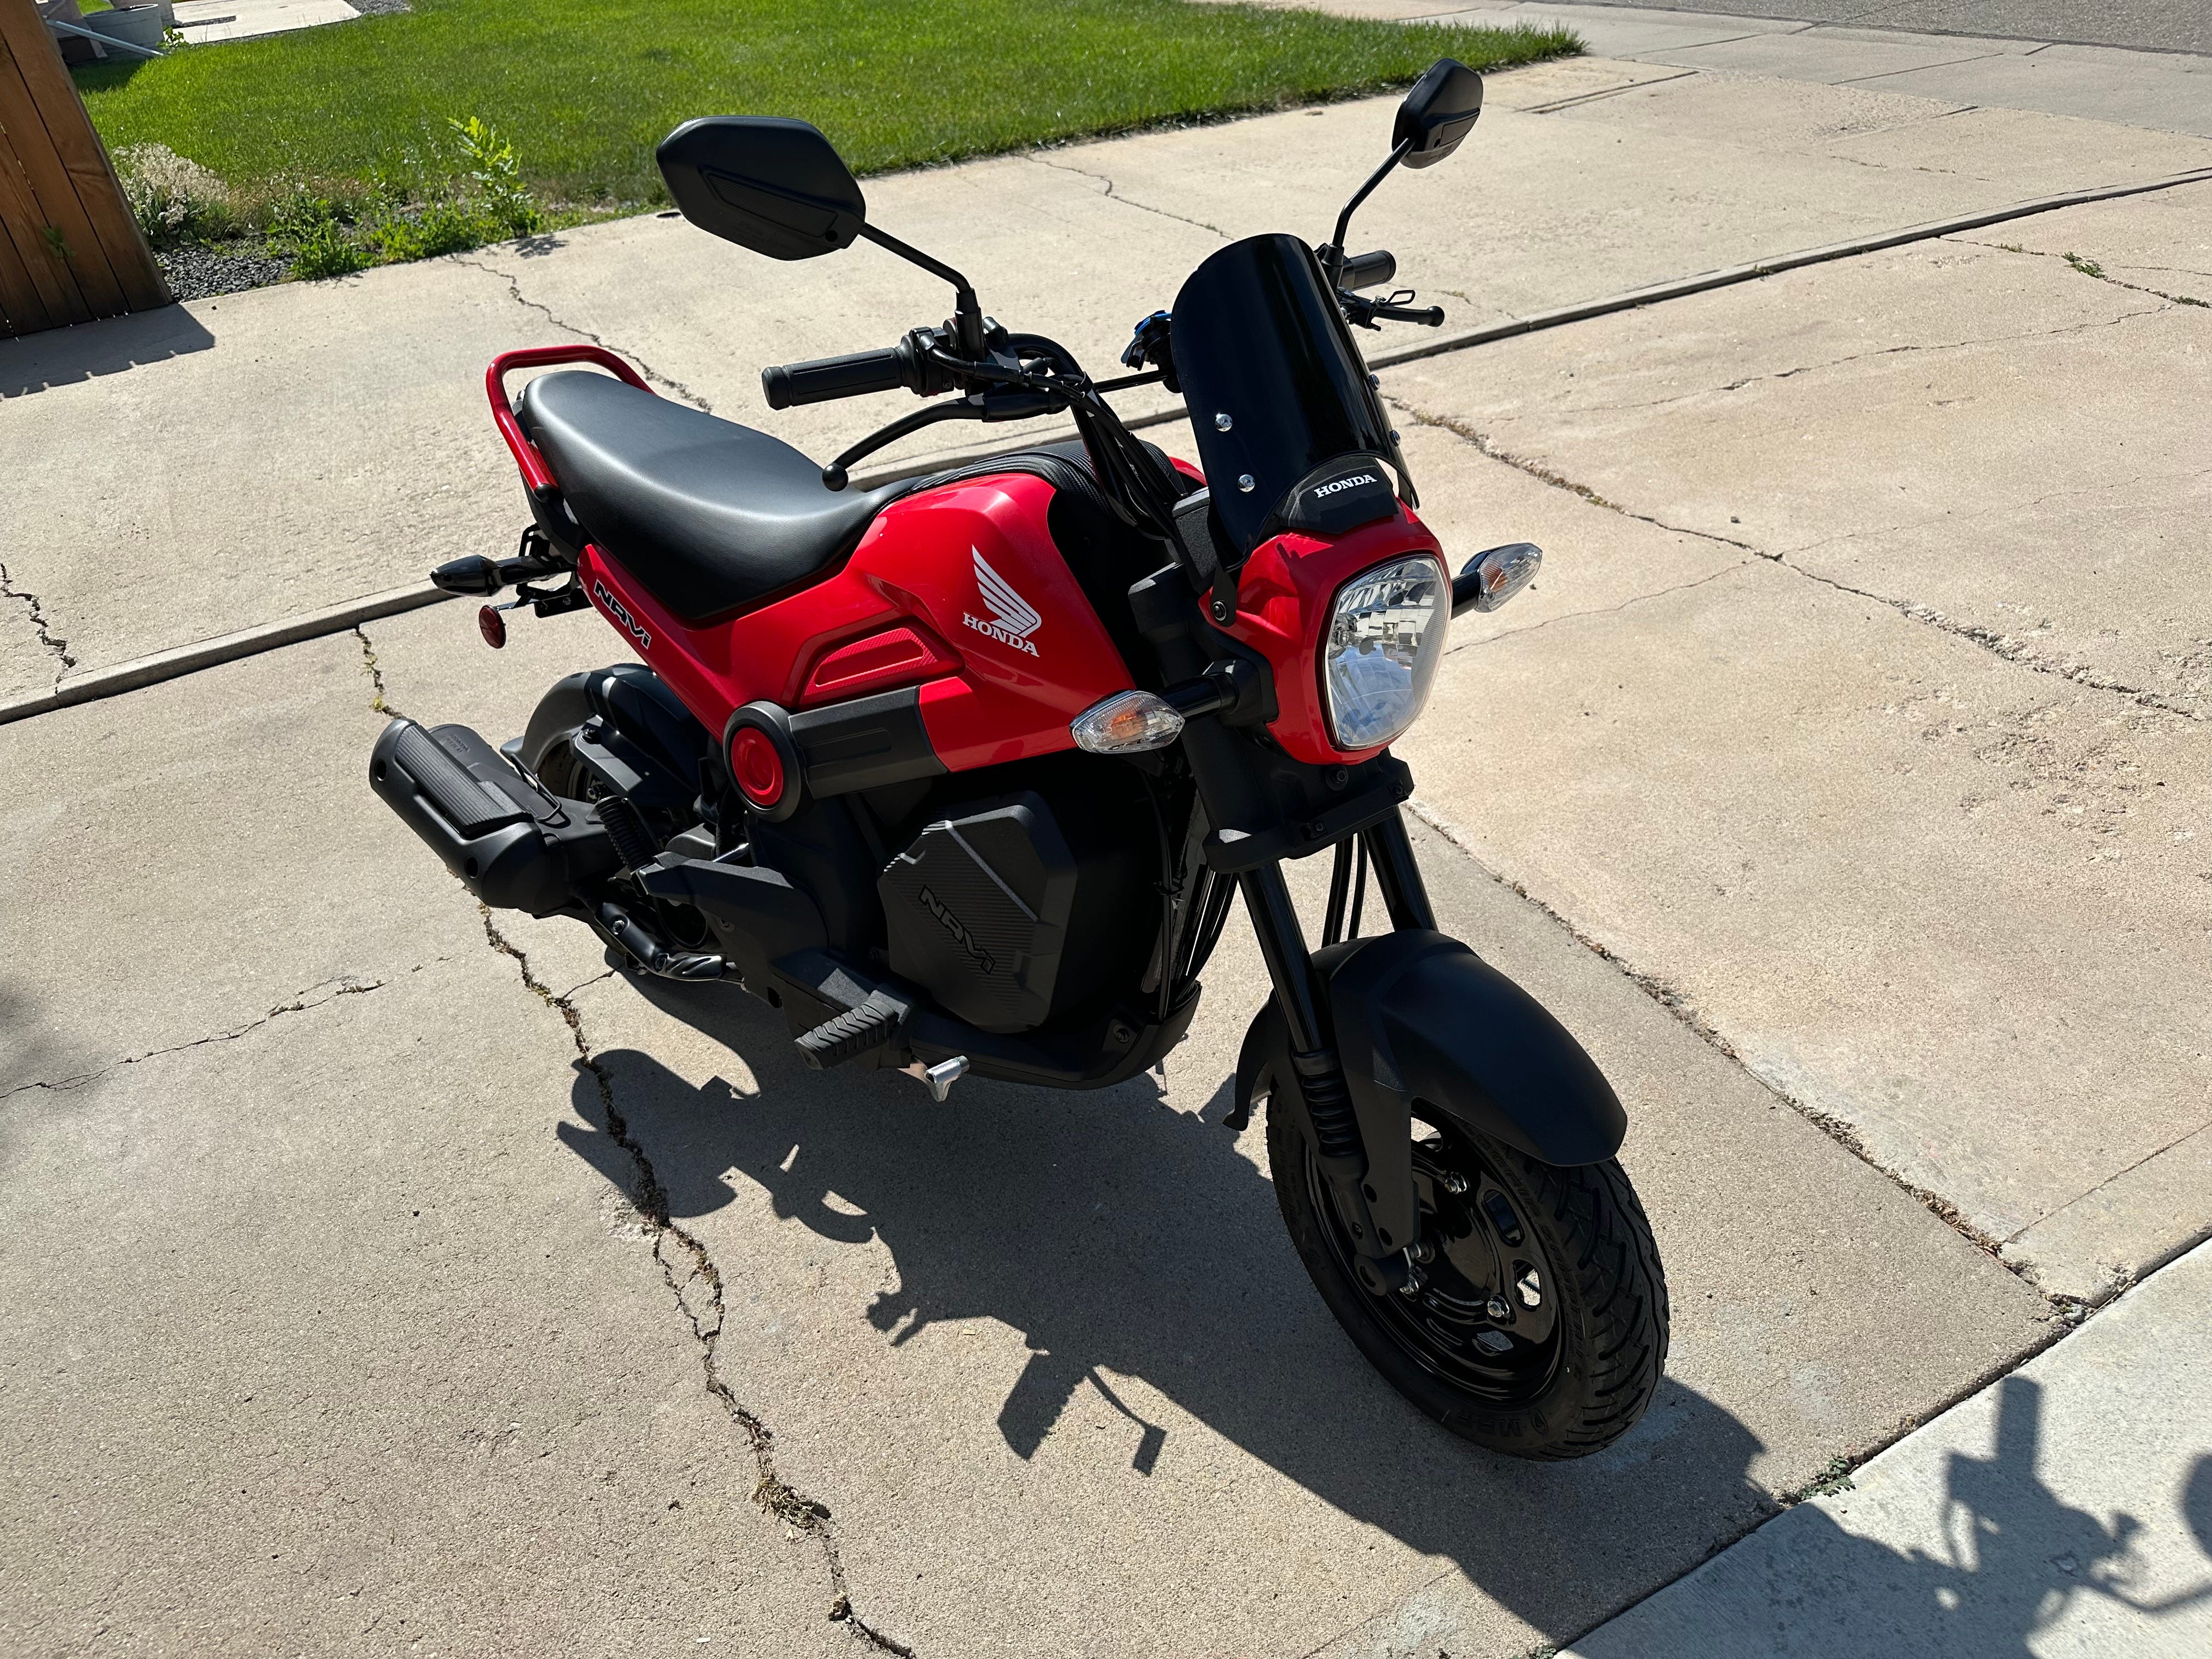
The Honda Navi is a 110cc 'motorcycle' although in reality it is based on a scooter platform. It has a CVT transmission and drum brakes. It is not sporty but it is one of those bikes that just makes you giggle. The Navi is part of Honda's mini-moto line along with the Grom, Monkey and others.

The role of the Navi is to get her used to life on two wheels and so far she is loving it. What helps is that I actually bought two of them so that I can ride with her.
Because the Navi has a CVT, it means there is no clutch or gears to worry about. This means that new riders can concentrate on the ride, and maneuvering rather than worrying about what gear to be in. That can come later.
Because I got two of them, I got them in different colors so that she can choose the color she likes. She went with the red, so I get the Grasshopper yellow.
The picture gives you an idea of how small these bikes are. I am 5'10 and about 210lbs in this picture and I look like a silverback on circus bike. So far I have managed to put about 24 miles on mine, and they are an absolute giggle to ride, despite the 12" front wheel and 10" rear wheel.
In terms of performance, it is best described as lacking. I can squeeze about 45mph out of it with the throttle pinned and it takes a while to get there! But, still fun.
So Cat is going to ride hers and train for the motorcycle test, and I am going to mod mine, a lot I think. In fact I am going to run this as a project. I have taken the red one and my wife has named it 'Lunch Box" and she has taken the grasshopper green one and its name is apparently 'Navicado'. I don't normally name my bikes but here we are.
Modding the Navi
So currently both bikes are stock but I want to play with mine a little. I plan on splitting my mods up into two parts; cosmetic and performance.
The cosmetic changes will reflect what I want the bike to look like and the possibilities here are endless. I am not going to go with a cruiser or sport bike look with it but I might turn it into a little cafe racer or maybe a little scrambler.
There are some performance mods that are a must on the Navi; replacing the air box, modifying the CVT and tuning the carb. I may also look for a big bore kit if such a thing exists. It would be interesting to see it with a 125cc motor instead of the 110cc. Care must be taken here though as the brakes are only simple drum brakes, and these small tires may have a speed rating that limits performance.
I also want to approach the mods from a somewhat scientific standpoint so I will baseline stock performance and then remeasure performance after each performance mod, so that we can see how much bang we get for our buck as it were.
Now before I get to carried away with performance modifications, I need to figure out what difference the mods make to the Navi. This means I need to baseline its performance.
Baseline the Performance
So what is baselining the performance? This is where we figure out the basic performance parameters of the bike. Manufacturers spend a lot of time and R&D effort on this sort of thing. We don't have that sort of budget so we need to take a simple approach.
So how do we do this?
First we need to define what we are going to measure and how we are going to measure those parameters. Now this is tricky because there is a bit of a chicken and egg problem here, but in essence I need to measure speed and acceleration. But how?
Well there are now a number of apps that can measure speed based on GPS and I have a GPS enabled iPhone so I think we are in business. The app I went with in the end was one called Car Test. As you will see in the screen grabs from my phone it gives me all the basic information that I need for my baseline.
The next thing we need is a repeatable surface to run the bike on so that we are using the same road surface and road length each time. I am lucky here in that the major road next to my subdivision is long, straight and flat and is not normally busy.
What results did we get?
So I played a little with the software to figure it out and then did a couple of runs. These are the screen grabs from those runs.

The top speed is a bit of a surprise at how low it is. The Navi is supposed to get to 50 mph but then I weigh a little over 200lbs so I guess it's hauling a bit of weight, not to mention the drag.

The parameters that I am going to look at are the zero to 10, 20 30 and 40 along with top speed and quarter mile. As it stands right now a top speed of 45mph with a quarter mine of 26-27 seconds is our benchmark.
In this third part of the series we are going to focus on the cosmetic changes. There are a number of changes that can be made and I guess I need to decide what sort of look I am going for. I could go with a sport look, or a cruiser but I think I want to make this street scrambler or adventure bike styled.
The Saddle Bags
Now I don't want to load this bike down that much, weight is an issue with an engine this small, so I went with token saddle bags. There are a lot of options out there, but what I went with were these.
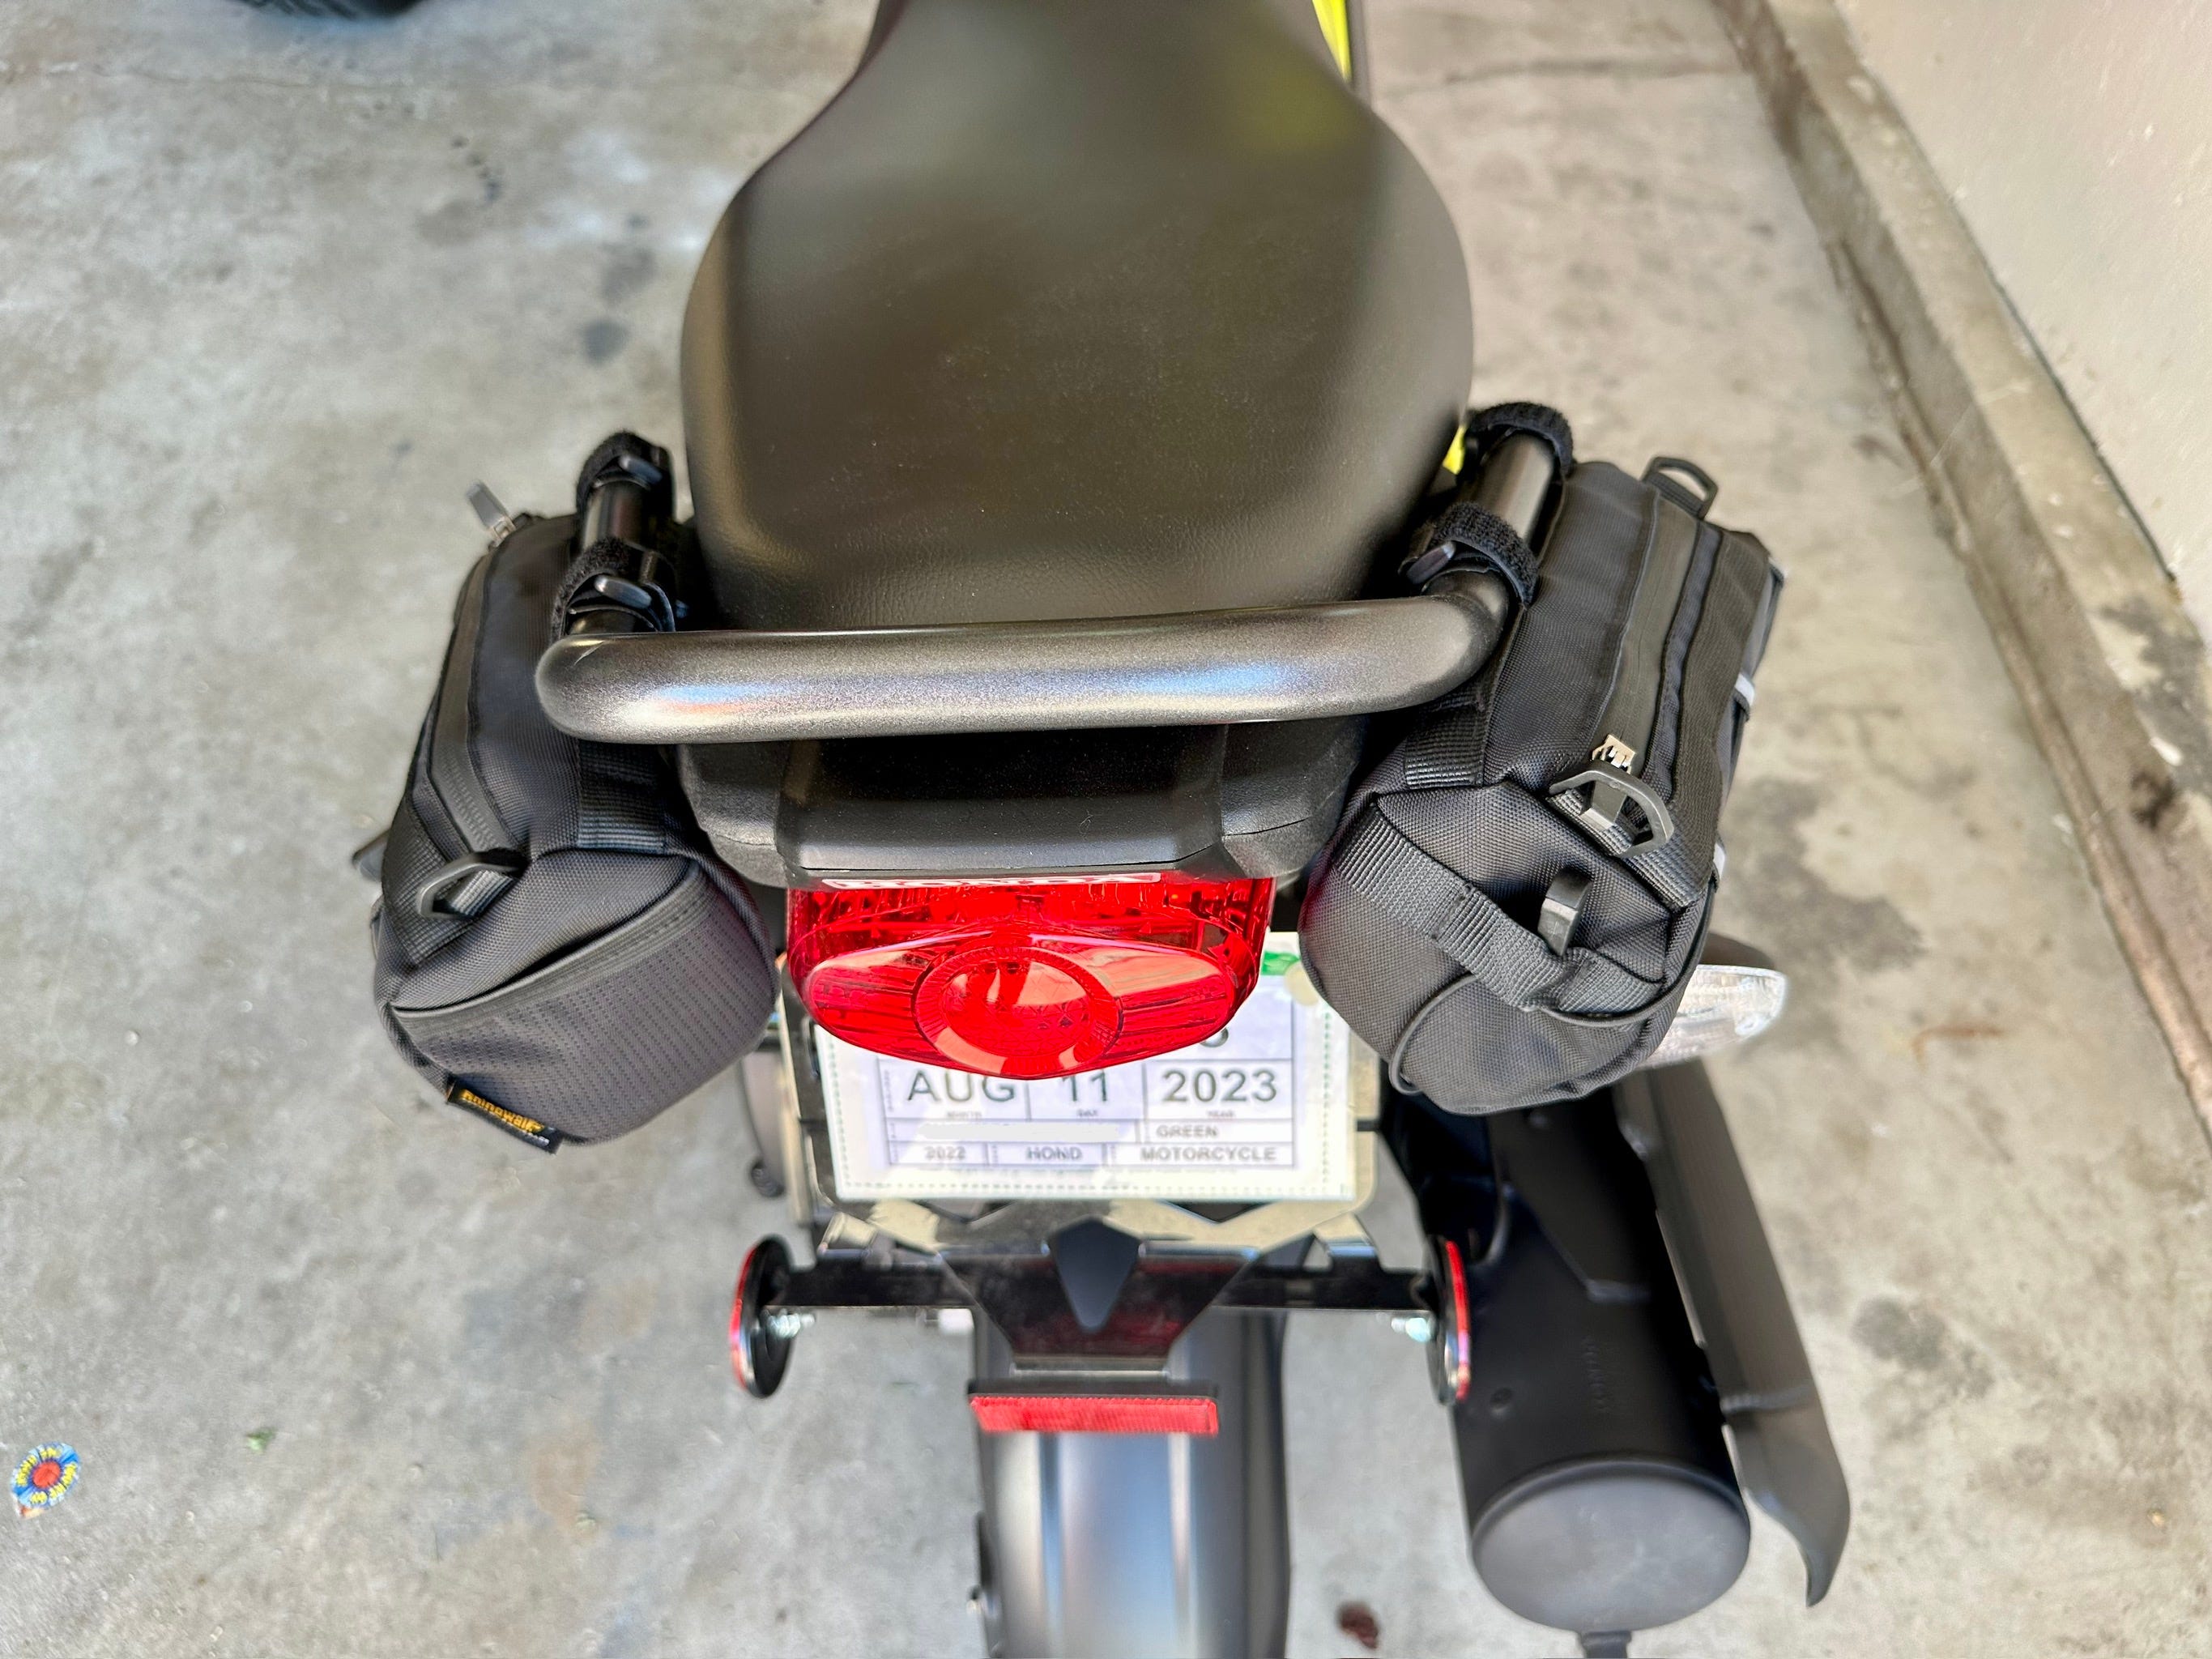
I have not tested this hypothesis yet but I suspect a Jimmy Johns sub will fit in there nicely. There is an argument to say that these are not needed given the storage box, but a little extra space might be handy.
The Screen
Based on the videos from Life of Burch, I chose the following screen from Amazon to put on the bike.
It should be pointed out that there is an issue with the kit in that being a universal kit, it does not have new mounting screws for the brackets and the Honda screws are not long enough to fit with the screen. So off to the local hardware store for a pair of 25mm x M5 bolts, some washers and spacers to provide some rigidity to the attachment point.
Remove the front reflectors
The front reflectors are gaudy and in my opinion unnecessary, and in fact very easy to remove. Just two screws to undo and the whole reflector assembly will come off.
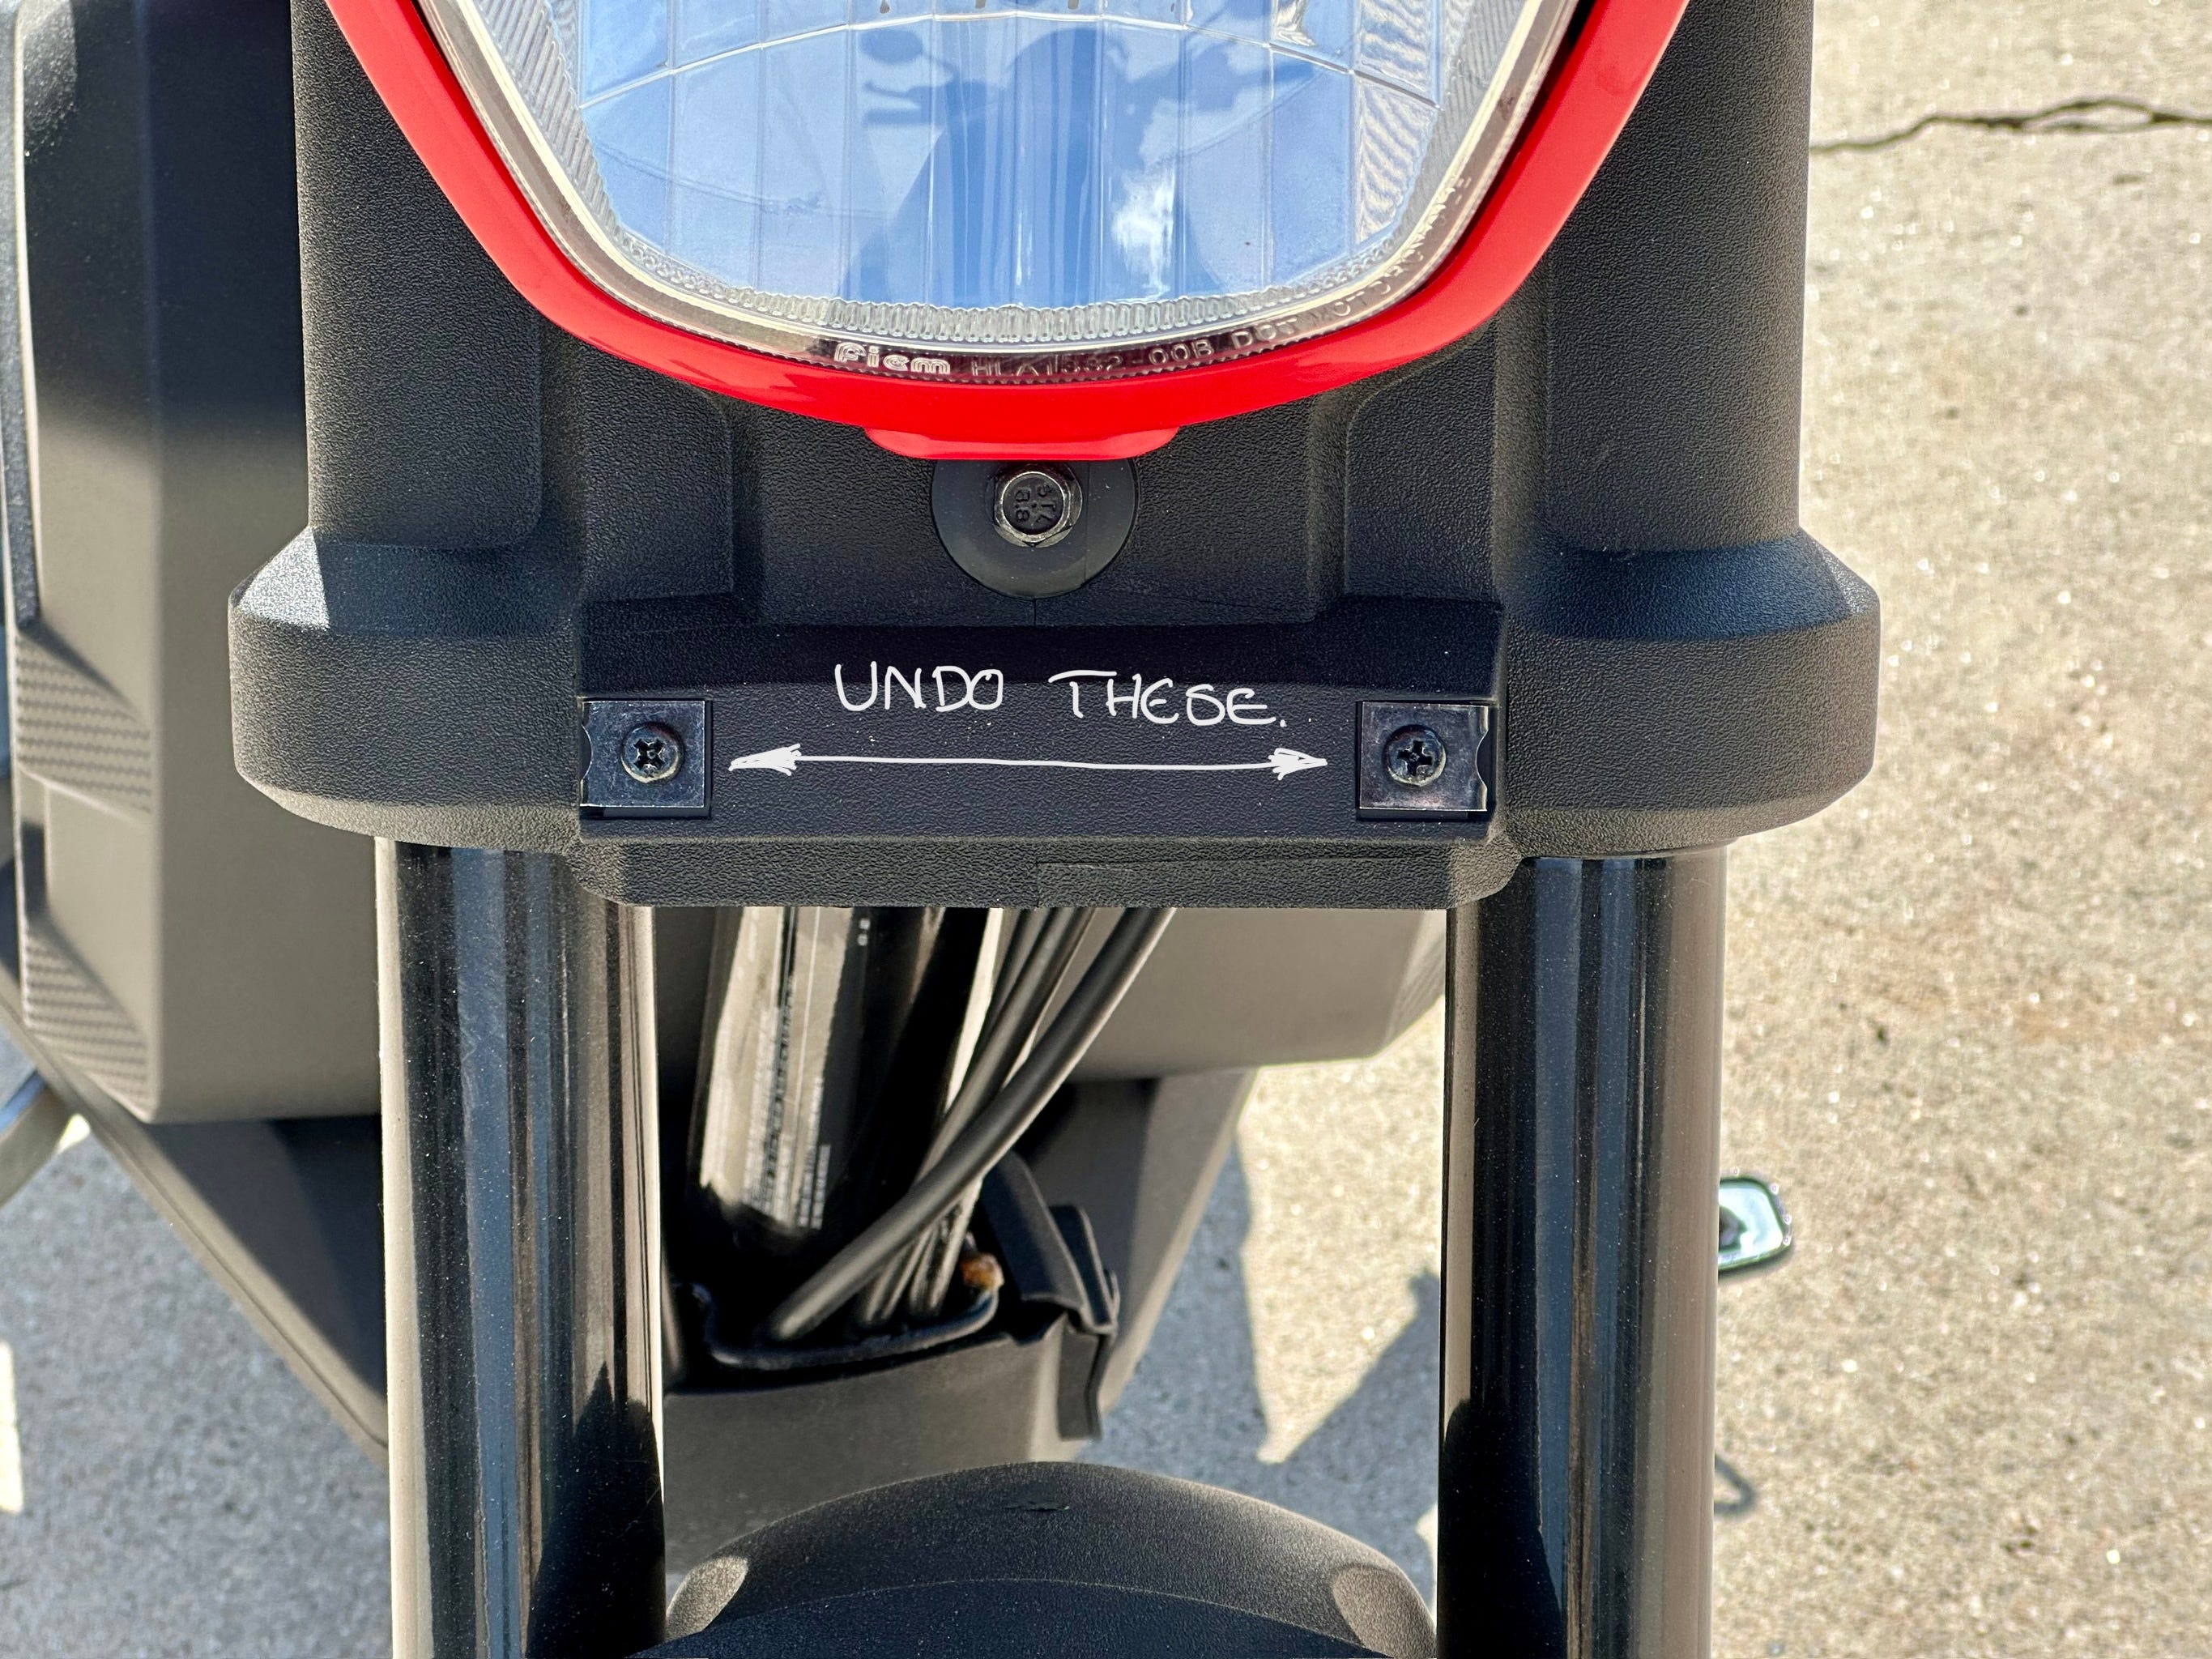
Once I had the reflector assembly off, I put the screws back in the holes just so that I know where they are. Amazon does have a little Navi badge that fits here so I might invest in one of those.
Add the Quad Lock
The last thing to add is the Quad Lock mount for my phone. While I don't plan on running the Navi long distances so I won't need navigation, it is handy for music and just some place to put the phone. The best place I have found for the phone is on the thin crossbar, so the mirror mount is the one to get.
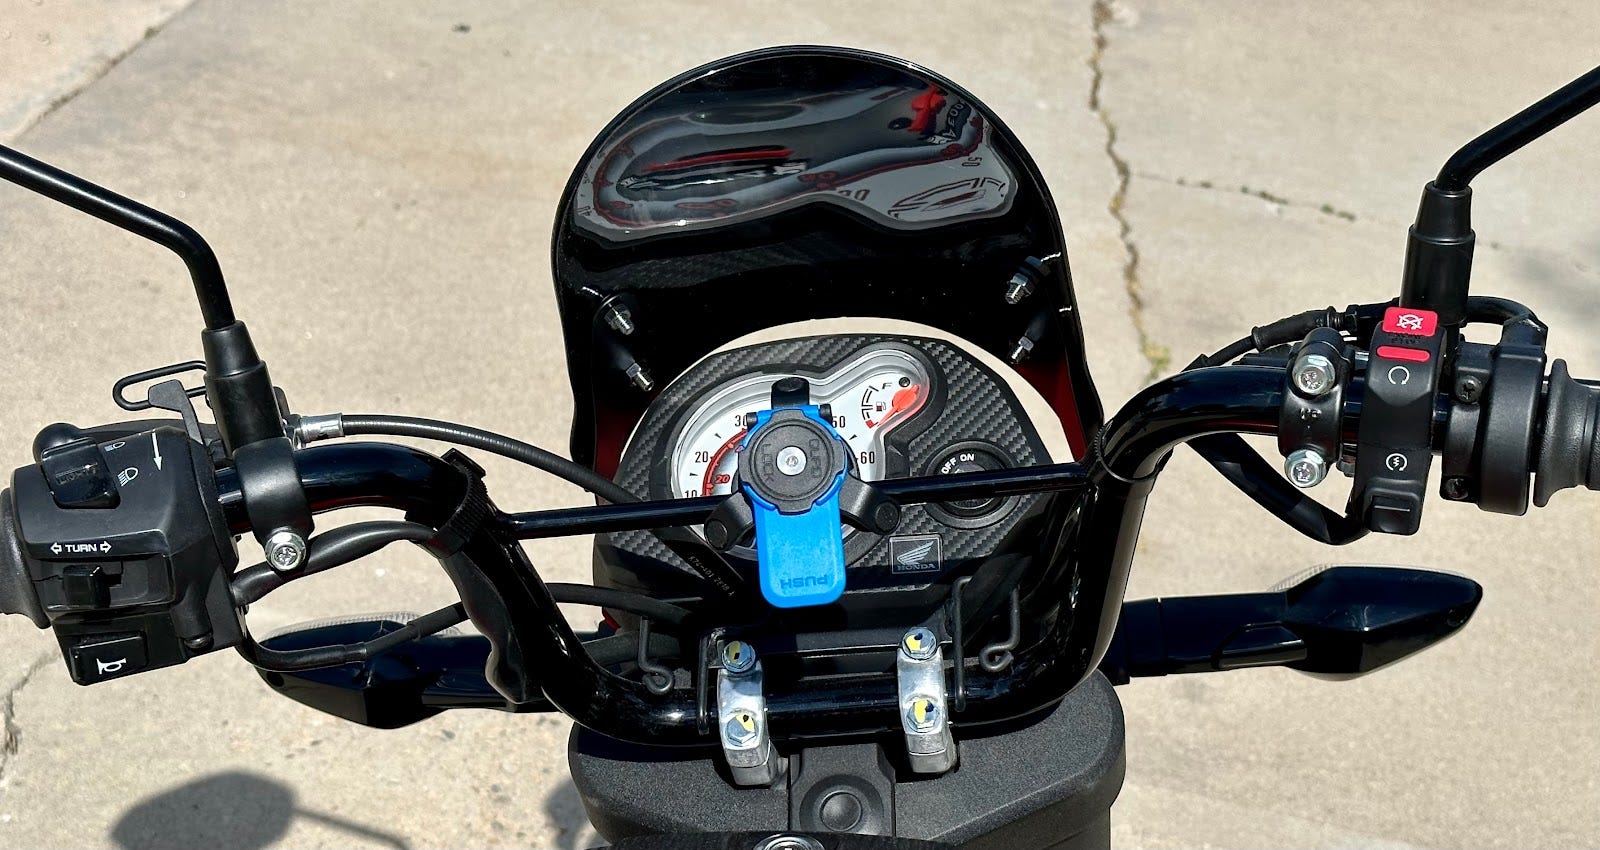
The only issue with this location is that it can obscure the instruments, mostly the indicator light for the flashers. I wondered about putting the Quad Lock mount on the mirror stem and it does work. In fact I filmed some video with my camera mounted that way.
Anyway, that is enough for now, I will write other posts with more cosmetic changes as well as the performance changes.
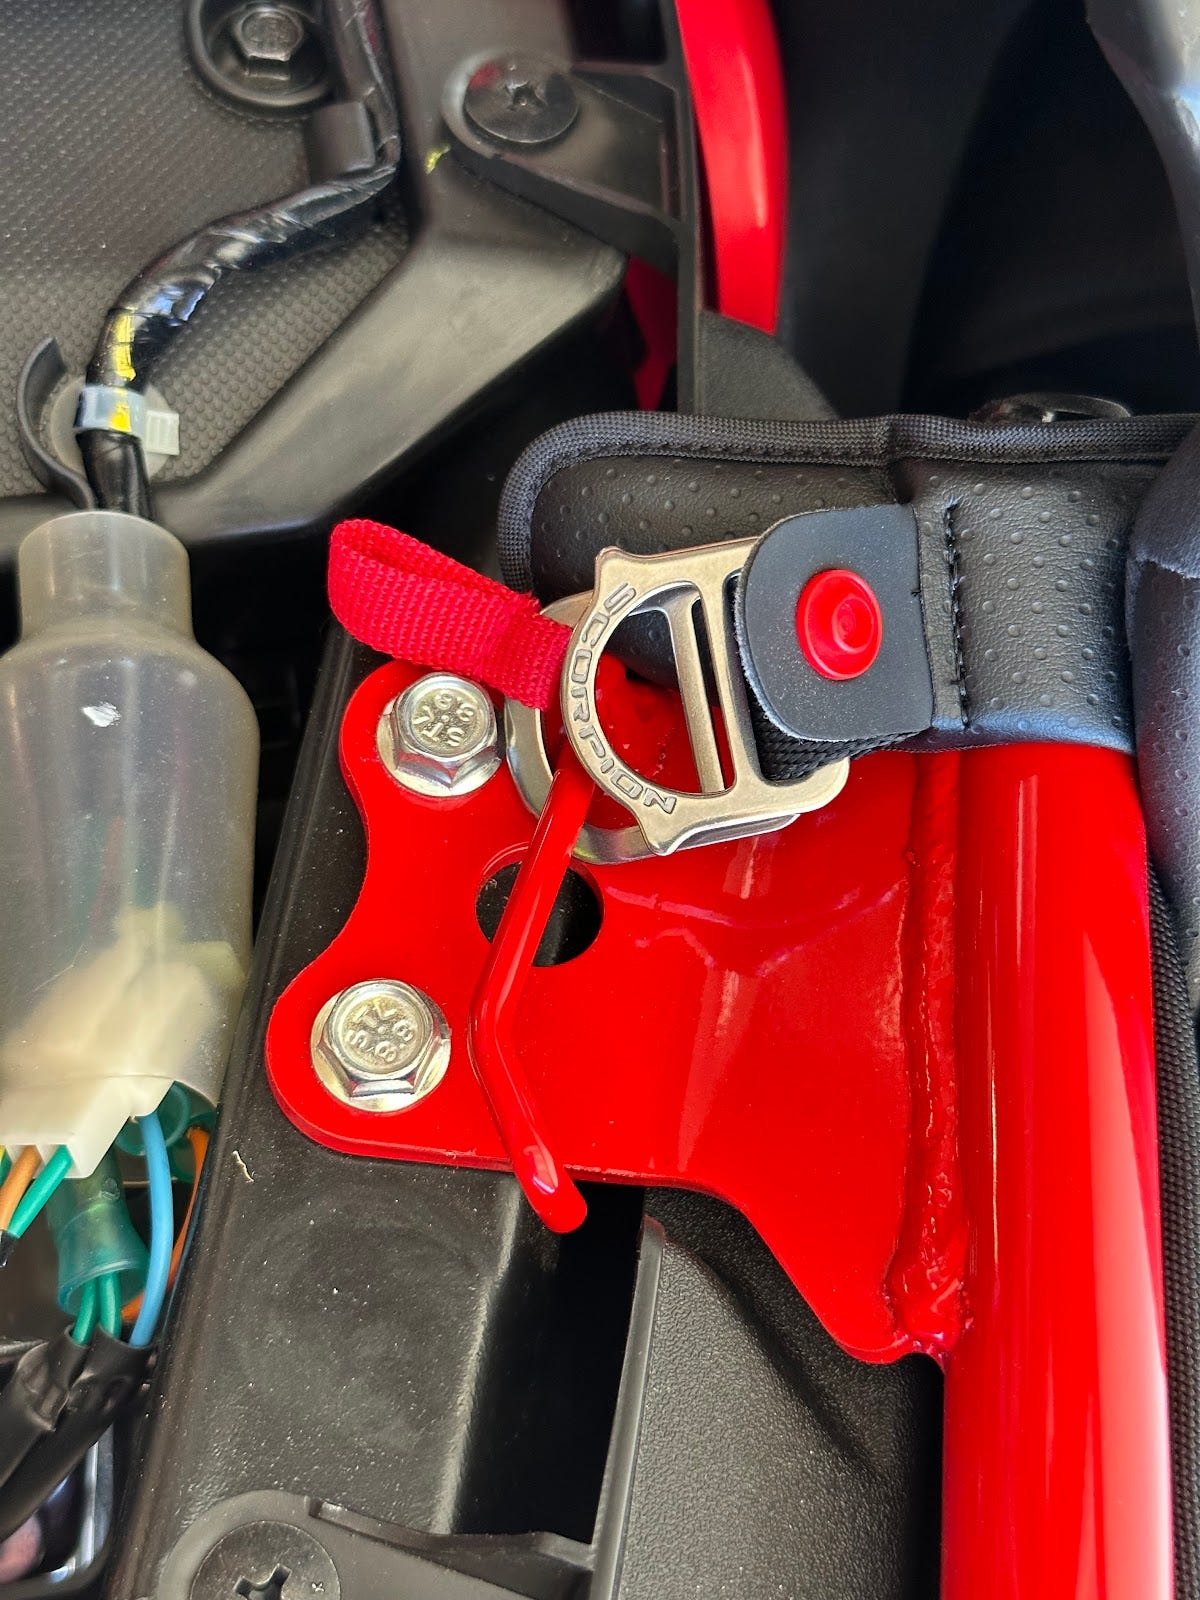
Fixing the Helmet Locks
As it leaves the factory, the helmet lock is completely useless. There is not enough gap between the lock assembly (a piece of bent steel) and the chassis to be able to get a helmet D ring in there. So you need to open up the gap for the helmet lock to work. I recommend a large flat bladed screwdriver and a towel. Use the towel to protect the paint work.
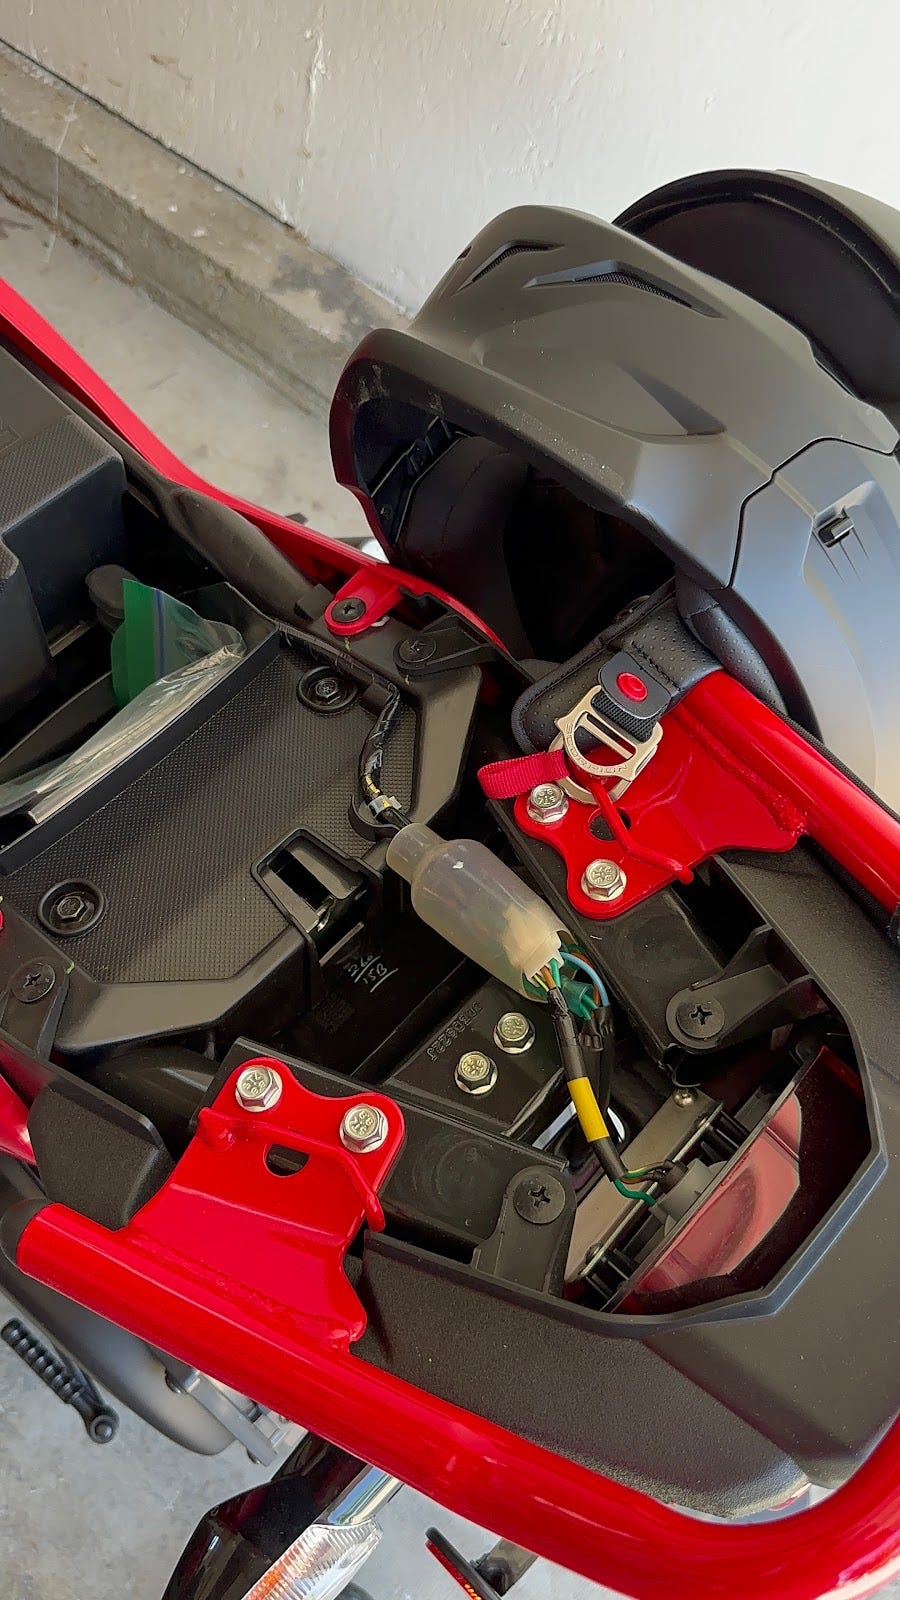
Just a gentle push is all it needs to move the metal a few millimeters. This will allow your D ring to pass unhindered, and allow you to still lock the seat in place.
And that is it, this is an easy mod. You don't even need to do this if you don't use the helmet lock.
Air Box removal and the MMNTB Kit
Sadly I don’t have pics of this but, I picked up a Man in the box air box removal kit for the Navi. Removing the air box is quite straightforward however the fitting of the new air filter to the carb was tricky. Also there is an issue with altitude. We live in Colorado at about 5200ft in altitude. This may account for the lack of performance that we saw in the baseline runs (above). I saw no change in performance with the new air intake although I did not re-jet the carb. It is possible that with some time and patience I could have got better performance out of the bike, but I did not have the time.
Conclusion
After some time, Cat decided to stay with the trike license and not move ahead with the bike license. This meant that the Navis were no longer needed, and as such were sold off for almost what we paid for them. They are great little bikes and we got a lot of enjoyment out of them. 10/10 Honda, ten out of ten.